Installing and testing your app
In the previous step, you learned how to build a working app manifest and added it to your demo app. In this step, you'll install the demo app on your Uberflip account and make sure it's working.
Install your app
While your app is in Draft status, you can still install it on your own Uberflip account for testing.
- Go to https://marketplace.uberflip.com/ and click on Developer to view your My Apps page.
- Click on the three-dot ("meatball") menu button beside your demo app.
- In the menu, click on Preview. You'll see a preview of your demo app's Uberflip Marketplace listing.
- On the listing page, click on the Install button. In the prompt that appears next, click on Install again. If the app was installed successfully, the Install button should no longer appear on the listing page.
- Go to https://app.uberflip.com/ to open the Uberflip web app. You should already be signed in with your developer account, since the same account is used for the Uberflip Marketplace. If not, sign in with the same account.
- Click on Marketplace in the top menu bar, then click on Installed Apps.
- Your demo app should be listed here:

Configure your app
The config_fields object in the app manifest you built creates a configuration field for your demo app that accepts a Google Tag Manager ID. Configure your app's settings to make sure it shows up and works as expected.
- Hover your mouse over your demo app on the Installed Apps page.
- *Click on the Edit (pencil)* button that appears on the right. This opens your demo app's settings page.
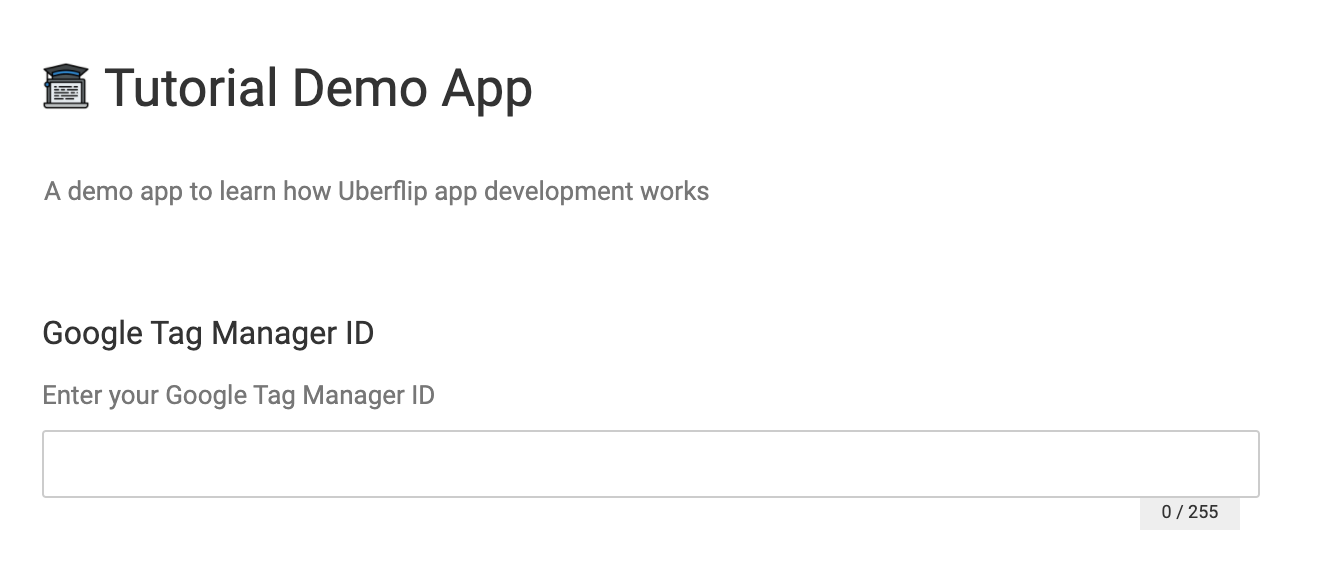
- You should see the Google Tag Manager ID setting here. Note how the label, the description, and the field type (textbox) are as you specified them in the app manifest:

- Type a Google Tag Manager ID into the field. If you have a real GTM Container ID, you can use that; if you don't, use this dummy GTM ID:
GTM-ABCDE12. - When you're done, click anywhere outside the field and your setting will save automatically.
Test your app
The account_code_blocks object you used in your app manifest takes the value of the configuration field you just filled in, drops it into a Google Tag Manager script, then injects that script into a Hub's HTML.
Specifically, this script will be injected into all pages of all Hubs that belong to the account where the app was installed. To make sure the app is working correctly, all you need to do is check out any Hub page on your development account.
- In the Uberflip web app (https://app.uberflip.com/), click on Hubs in the top menu, then click on any Hub to navigate to it.
- Near the top of the sidebar menu on the left, click on the Open button to view this Hub's frontend. The Hub homepage opens in a new tab.
- View the page's HTML source (right-click anywhere > View Source Code).
- Scroll all the way to the bottom of the page.
- Just before the closing
</body>tag, you should see the snippet injected by your demo app, :

- Lastly, note the GTM ID that appears at the end of the script source URL, which should be the same as the ID you entered into the configuration field:

Congratulations: you've just registered, built, installed, and tested your very first Uberflip platform app! In the final part of this tutorial, you'll learn how to get started with developing your own apps.
Updated almost 2 years ago
